Real-Time Remote Control via VR over Limited Wireless Connectivity [arXiv]
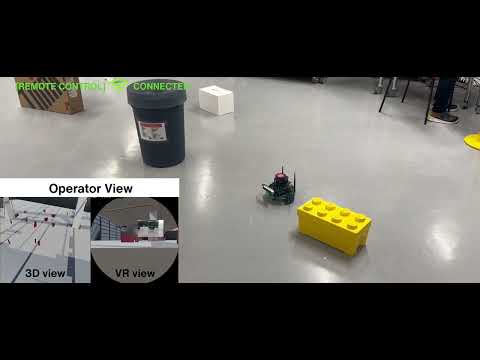
This repository showcases a project aimed at addressing the challenge of efficient navigation and operation in semi-autonomous robotics, particularly in environments with limited connectivity between robots and humans. By integrating control systems, communication networks, and computation servers, we aim to create a user-friendly semi-autonomous system. Our approach involves remote control via a VR interface, allowing a human operator to control the robot in real time, even in dynamic environments. In instances of connectivity loss, the robot autonomously navigates towards its last known destination while avoiding obstacles until the connection is restored. Our results demonstrate the adaptability of our system, ensuring seamless transitions between remote control and autonomous navigation, thus promising improved human-robot interaction in challenging settings.
The system architecture for this demonstration involves the integration of hardware and software components.
- Jetbot ROS Ai kit
- Two Server Computers
- Varjo VR-1 headset
- Opencv
- Robot Operating System (ROS)
- Unity (game engine)
In this section, we will outline the setup process for the hardware components. The demo setup includes a robot, two server computers, and a VR headset. Let's delve into the specifics of setting up this hardware configuration.
The robot utilized in this work is based on the open-source 'JetBot ROS AI Kit,' which is built on the NVIDIA Jetson Nano. It is equipped with a 360-degree laser-ranging LiDAR for observing the surroundings from the middle of the robot. Additionally, the robot integrates a RealSense D415 depth camera.For detailed instructions on setting up the robots, please refer to the official page.
Furthermore, the installation process involved setting up the RealSense SDK by downloading it from the official Intel website and following the provided installation instructions. For OpenCV, the installation was done using the pip package manager with the following command in a terminal:
pip install opencv-python
Moreover, the TurtleBot3 ROS packages were downloaded and set up by following the instructions provided on the official page.Please refer to the official page.Now, download this GitHub repository and copy the Jetbot folder to your ROS workspace. After copying the folder, build your workspace:
cd ~/<ros_workspace>/
catkin_make
source ~/<ros_workspace>/devel/setup.bash
Now insert the IP address of server B into the code located at 'Jetbot/connection_check/src/check.py'.
Server A is an Ubuntu OS running machine equipped with ROS (Robot Operating System).To set up Server A, first, create a ROS workspace. Next, download this GitHub repository. Finally, copy the Server A folder into your ROS workspace and build your workspace:
cd ~/<ros_workspace>/
catkin_make
source ~/<ros_workspace>/devel/setup.bash
To configure server B, employ a machine equipped with the Windows 11 OS. Start by installing the Unity software. Next, import the Varjo XR plugin, the ROS TCP Connector plugin, and the URDF Importer plugin into the Unity game engine. Refer to the instructions provided on the official page below for guidance.
Next, add the Server B Asset folder to your Unity project.
To generate the occupancy grid map for navigation purposes, begin by establishing a connection to the robot via server A using SSH.Once connected, execute the following command in the terminal to launch the SLAM (Simultaneous Localization and Mapping) module:
roslaunch jetbot_slam slam_run.launch
Next, switch to the terminal of server A and run the following command to visualize the SLAM output:
roslaunch turtle_jet jetbot_slam_view.launch
After exploring the designated area, ensure to save the resulting 2D map for navigation purposes.
Now, ensure that both the robot and the server computer are connected to the same Wi-Fi network.Set the robot’s initial position approximately the same on both the virtual map and the physical test area. Proceed to establish an SSH connection to the robot through server A. Execute the following command to initiate navigation:
roslaunch jetbot_nav nav_run.launch
Following this, open another terminal on server A and execute the command below to visualize the navigation output:
roslaunch turtle_jet jetbot_nav_view.launch
Finally, execute your Unity project on server B.
- H.P. Madushanka (madushanka.hewapathiranage@oulu.fi)
- Rafaela Scaciota (rafaela.scaciotatimoesdasilva@oulu.fi)
- Sumudu Samarakoon (sumudu.samarakoon@oulu.fi)
- Mehdi Bennis (mehdi.bennis@oulu.fi)